
Table of contents
Open Table of contents
Introduction
If you’re anything like me and use Obsidian for all your notes, then keeping them updated across all your devices is a huge deal. Now, sure, there’s the official Obsidian Sync service and other cloud stuff out there, and they’re pretty easy. But honestly, sometimes that means giving up a bit of privacy, right? I really wanted a way to sync my notes that felt strong, private, and totally under my control. After trying out a bunch of options, Syncthing totally won me over. So, in this post, I’m gonna walk you through how I got Syncthing all set up to smoothly sync my Obsidian notes across my Windows laptop, Windows desktop, and Android phone. It’s truly a private way to keep your notes in sync, just for you!
My Use Case: Syncing Without the Wait
Before I dive into the nitty-gritty, let me tell you what I really wanted out of a sync solution. With things like LiveSync, Remotely Save, or even Git, I always had this annoying wait. I’d open Obsidian, and then I’d have to just sit there for 30 to 60 seconds, sometimes even longer, waiting for the vault to fully sync up before I could actually start working. My goal was simple: I wanted my Obsidian vault to be completely synced and ready to go before I even launched the app. No more waiting around, just instant access to my notes, no matter which device I picked up.
Why Syncthing?
Before I landed on Syncthing, I went on a bit of a journey, experimenting with a few other methods. Each one had its good points and its not-so-good points:
- Git: I thought, “Hey, GitHub for hosting, top-tier version history, what’s not to love?” And yeah, the version history was a big plus. But man, Git syncing often led to a ton of conflicts, it was pretty slow, and just like the others, Obsidian had to be open while it was doing its thing. Fun fact: I actually had an old Git folder in my vault from a previous attempt, and it caused some headaches with Syncthing until I finally deleted it.
- Remotely Save Plugin: This one seemed cool, offering multiple places to sync to, like Nextcloud. But it ended up being super slow because it only synced at set times. Plus, the setup felt kinda complicated, it was a bit flaky with some of my plugins, and yep, Obsidian had to be open for it to sync.
- Self-Hosted LiveSync Plugin: This one was fast, and I loved having a lot of control over it. The downside? It was a complex beast to set up, often felt fragile with other plugins, and relied on something called CouchDB, which could get a little “weird” with certain Obsidian plugins. And, you guessed it, Obsidian needed to be open to sync.
So, why did Syncthing win? Here are its superpowers (and a couple of tiny quirks):
Syncthing really shone through, tackling all the annoyances I had with the other methods:
- Always Running in the Background: This is huge! Unlike plugin-based solutions, Syncthing just hums along in the background. That means my vault is always up-to-date, even if Obsidian isn’t running.
- Simple, Easy Setup (Overall): Once you get the hang of how it works, setting up Syncthing is actually pretty straightforward.
- Stored as Real Files: Syncthing works directly with your files on your computer’s file system, which makes everything super transparent and reliable.
- Separate Management: Syncthing has its own dedicated control panel (a web interface), so managing your syncing is totally separate from Obsidian’s own settings.
- Syncs All Plugins Reliably: Big win here! Syncthing flawlessly syncs my entire
.obsidianfolder, including all your plugin settings, themes, and snippets, without any fuss. - Reliable So Far: My experience has shown Syncthing to be consistently dependable. It just works!
- No Per-Device Headaches: Once you set up a shared folder, adding new devices to that share is basically the same process on any platform. No weird, specific setups for each one.
- Minor Quirks: Yeah, you do have to install a separate app for it. And it can be a tiny bit slower than the self-hosted LiveSync plugin. But honestly, the reliability and the fact that it syncs in the background totally make up for that.
My Multi-Device Syncthing Setup: A Walkthrough
Here’s how I got Syncthing all set up across my different devices:
1. Windows Devices (Laptop & Desktop):
For Windows, I found this awesome project called Bill-Stewart/SyncthingWindowsSetup. It handles all the tricky bits like installation, running it as a service, and even firewall rules, which makes it way easier than doing it all manually.
- First, a little prep (if you hit a snag): If you run into issues with during installation, please read the docs for this installation tool. What I had to do was just open an elevated Command Prompt (run as administrator) and type this in:
reg add "HKCR\.js" /ve /d "JSFile" - Installation: I used WinGet, which is a super handy package manager for Windows:
winget install BillStewart.SyncthingWindowsSetup - Initial Setup: After it installed, Syncthing usually starts up on its own. I just searched for “Start Syncthing” in Windows, confirmed it was running, and then opened the “Syncthing configuration page” (also found via search).
- The first time, it’ll ask you to set up a username and password for its web interface. After logging in, I deleted the default shared folder it creates.
2. Android Phone:
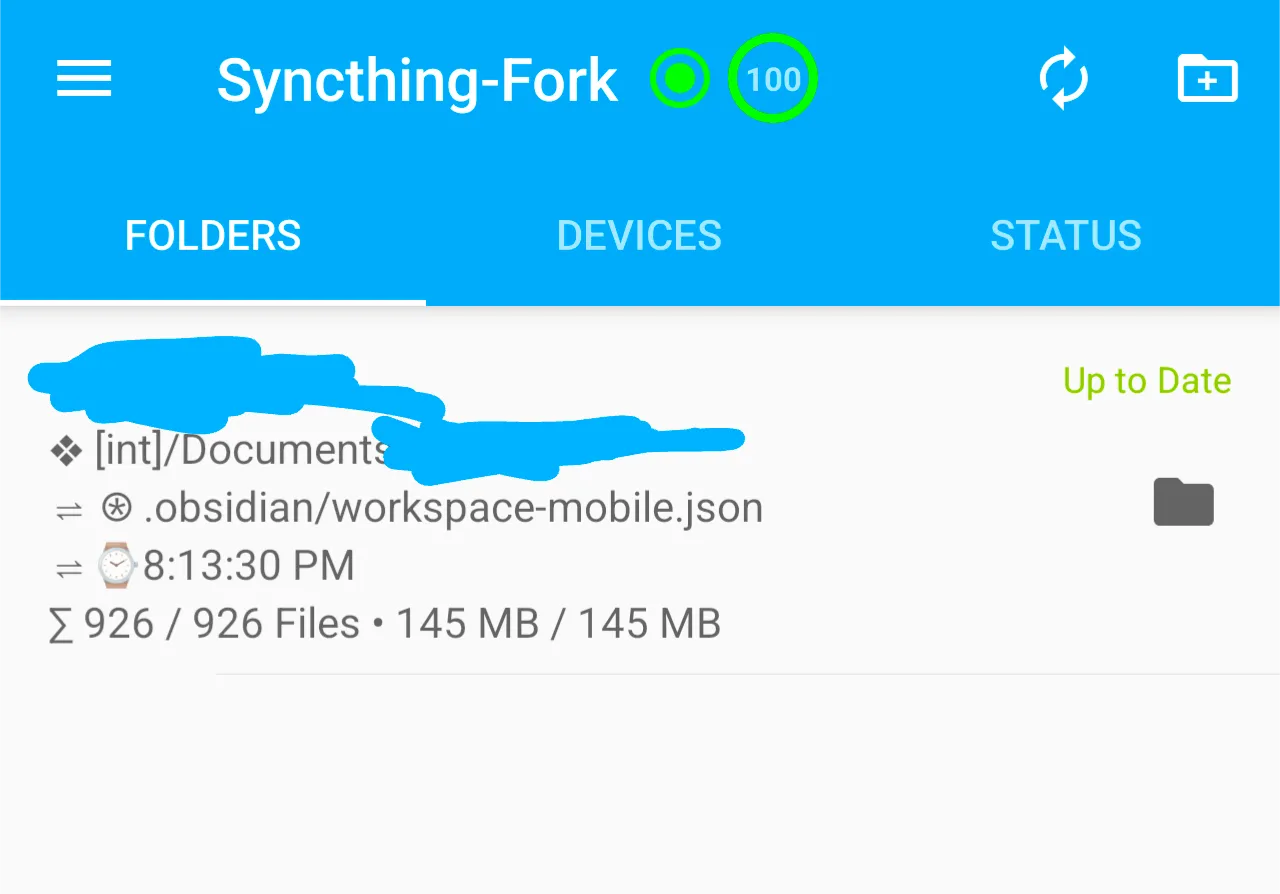
On my Android phone, I went for the Syncthing-Fork app from the Google Play Store. This version often has some cool extra features and runs really well on Android.
The APK can also be found on Github! Catfriend1/syncthing-android
Connecting Everything & Getting Your Obsidian Vault Syncing
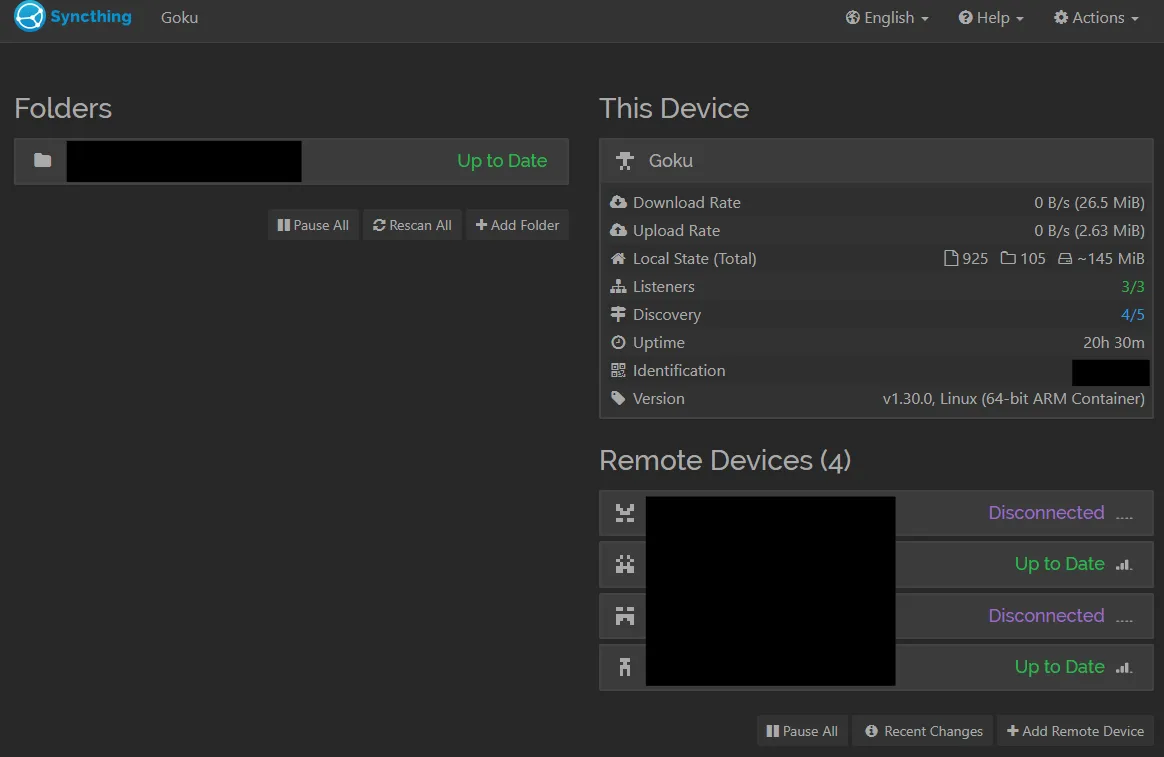
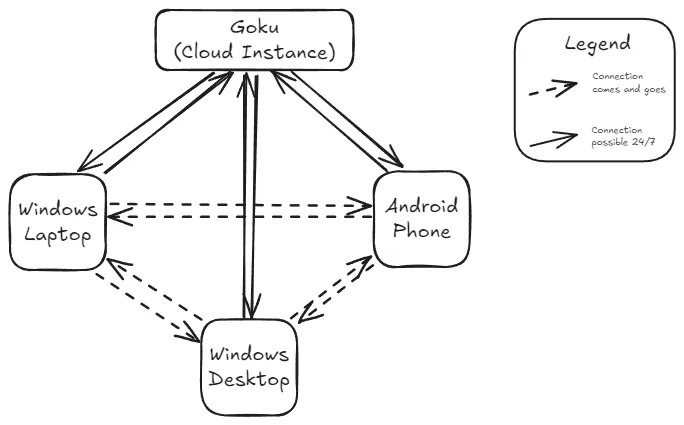
The real magic of Syncthing is getting all your devices to trust each other and then telling them which folders to share. My first move was connecting my Windows laptop to my “Goku” instance – that’s my always-on Syncthing server running 24/7 in an Oracle Cloud VM using Docker Compose and Coolify.
This 24/7 server isn’t strictly necessary, but it will guarantee that your changes will be heard whenever you’re working in your Obsidian vault.
Here are the steps I followed to connect my devices and share my vault:
-
Adding a Remote Device (on Windows):
- In the Windows Syncthing Web UI, I clicked “Add Remote Device.”
- I grabbed the Device ID from my “Goku” Syncthing Web UI (it’s a long string of letters and numbers) and pasted it into the field. I also gave it a friendly name, like “Goku.”
- Under the “Sharing” tab for “Goku,” I checked the “Introducer” box. This is neat because it lets “Goku” help my Windows machine find and connect to my other Syncthing devices automatically.
- Then, I just saved the device settings.
-
Accepting the Connection (on Goku):
- Over on “Goku’s” Syncthing Web UI, a notification popped up asking to accept the new device connection from my Windows machine. I clicked “Accept.”
-
Share Your Obsidian Vault Folder:
- Super important tip here: I made absolutely sure Obsidian was closed on all my devices during this initial full sync process. This helps prevent any weird conflicts.
- On the device where my main Obsidian vault lives (in my case, “Goku”), I went to the folder that holds my Obsidian vault.
- Under the “Share” tab for that folder, I checked the box next to my new Windows device.
- Back on the Windows Syncthing Web UI, I got a notification to accept the new shared folder. I clicked “Accept.”
- I then told Syncthing the local folder path on my Windows machine where I wanted the Obsidian vault to be copied and synced.
- Finally, under the “Devices” tab for this shared folder, I made sure all the devices I wanted to sync with (Windows, Goku, Android) were selected.
-
Turning on Staggered File Versioning (Seriously, do this!):
- For each shared Obsidian vault folder, I went into the “Versioning” tab.
- I picked “Staggered File Versioning.” This feature keeps multiple old copies of your changed files, but it’s smart about it – it deletes really old ones after a while or if disk space gets low. This has been a total lifesaver for me, especially when I’ve had conflicts or accidentally messed something up in my
.obsidianconfiguration folder. If things go sideways, I can easily grab an older version of a whole folder!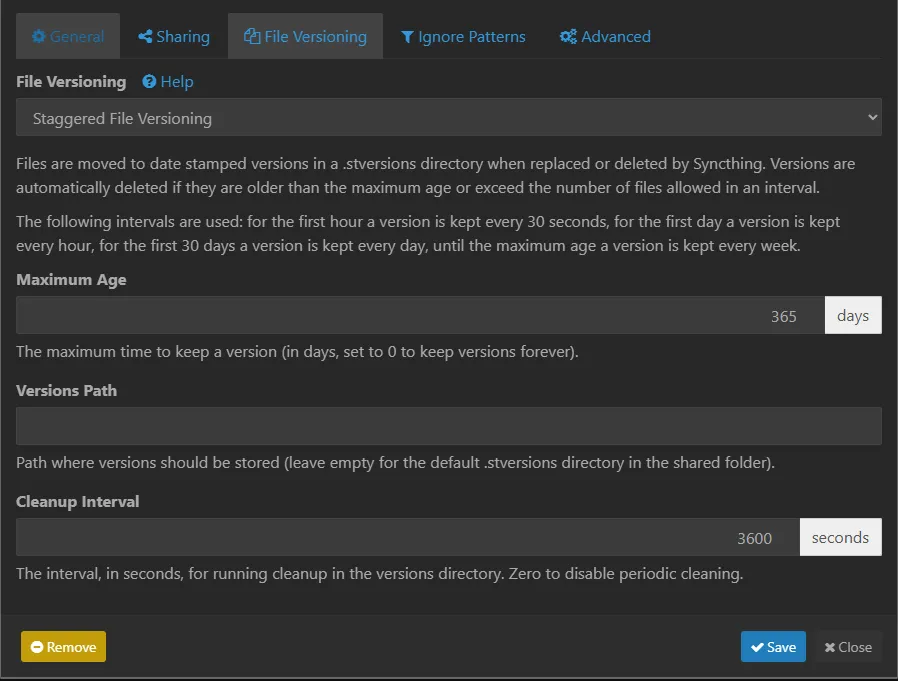 I just use the default settings for Staggered File Versioning
-
No
.stignoreNeeded (So far, so good!):- Funnily enough, I haven’t even needed to create a
.stignorefile for my Obsidian vault. Syncthing has just handled syncing everything, including the.obsidianfolder and all its little files (likeworkspace.jsonandtrash), without any problems or conflicts. All my devices are set to “Send & Receive,” which means they can both send and get changes.
- Funnily enough, I haven’t even needed to create a
✅ Quick Tips for a Super Smooth Obsidian Sync
- First Sync Rule: Always, always, always close Obsidian on all your devices before that very first full sync of your vault. It just helps avoid any messy conflicts.
- Adding New Devices Later: When you bring a new device into your Syncthing network, add its Device ID to your existing devices, then configure the shared folder on the new device, pointing it to your Obsidian vault’s location. Just be patient and wait for that initial sync to finish before you open Obsidian on the newly added device.
- Leverage Versioning: Do not skip Syncthing’s file versioning, especially “Staggered File Versioning.” It’s your ultimate safety net against accidental data loss or corruption. I’m telling you, I’ve personally used it to bring back entire parts of my
.obsidianfolder when I was troubleshooting. - Monitor Syncthing UI: Every now and then, pop open the Syncthing Web UI on your devices. It gives you great info on what’s syncing, which devices are connected, and if anything’s “out of sync.”
- Battery Life (Android): I haven’t noticed a huge battery hit on my Android phone from Syncthing yet, but
Syncthing-Forkusually has some good settings to help with battery optimization.
Honestly, Syncthing has completely changed how I use Obsidian. It’s given me a truly private, reliable, and flexible way to keep my notes perfectly synced across all my gadgets. If you’re looking to take charge of your Obsidian vault’s syncing without paying that subscription, then Syncthing is definitely something you should check out!